By clicking on the featured links, visitors will leave NationalGeographic.com and be directed to third-party e-commerce sites that operate under different terms and privacy policies. As a participant in multiple affiliate marketing programs, National Geographic will earn a commission for certain purchases. See full disclaimer below.*
The most natural way to nourish your garden lies within the contents of your trash can. Run-of-the-mill waste like dog hair, orange peels, and fallen leaves are all perfect fodder for composting—the process of recycling organic material into nutrient-rich fertilizer by breaking it down with microorganisms.
Besides being a great way to improve plant growth, greenhouse manager Sarah Warner says composting can also reduce landfill waste, improve water retention and soil health, and save you money on bottled fertilizers. Making high-quality humus—the dark, fertile layer of organic matter that forms when plants and animals decay—in your own backyard is as convenient for your garden as it is good for the environment. And it’s a lot easier than you might think to learn how to start a garden with compost.
(Learn more about the science behind composting—and why it’s good for the environment.)
How to compost at home for beginners — Step by step
General composting requires only a few simple steps, which we’ll discuss in more detail below.
-
Step 1: Select your composting site.
-
Step 2: Get the right composting equipment.
-
Step 3: Determine how you’ll collect materials.
-
Step 4: Start saving materials.
-
Step 5: Create your first layer.
-
Step 6: Maintain and monitor your heap.
Step 1: Select your composting site
The first major step is determining where and how you’ll set up your composting site. We’ll cover more specific types of composting below (like using tumblers, bins, and indoor setups), but if your site is outside, Warner advises against choosing a location next to a house or fence.
“Having a pile against a house can attract pests to nest in your home since a food source is close by,” she says. “It can also stain or negatively affect the siding on a house. Since composting is decomposition, having it against a fence may promote decomposition of the fence.”
Step 2: Get the right composting equipment
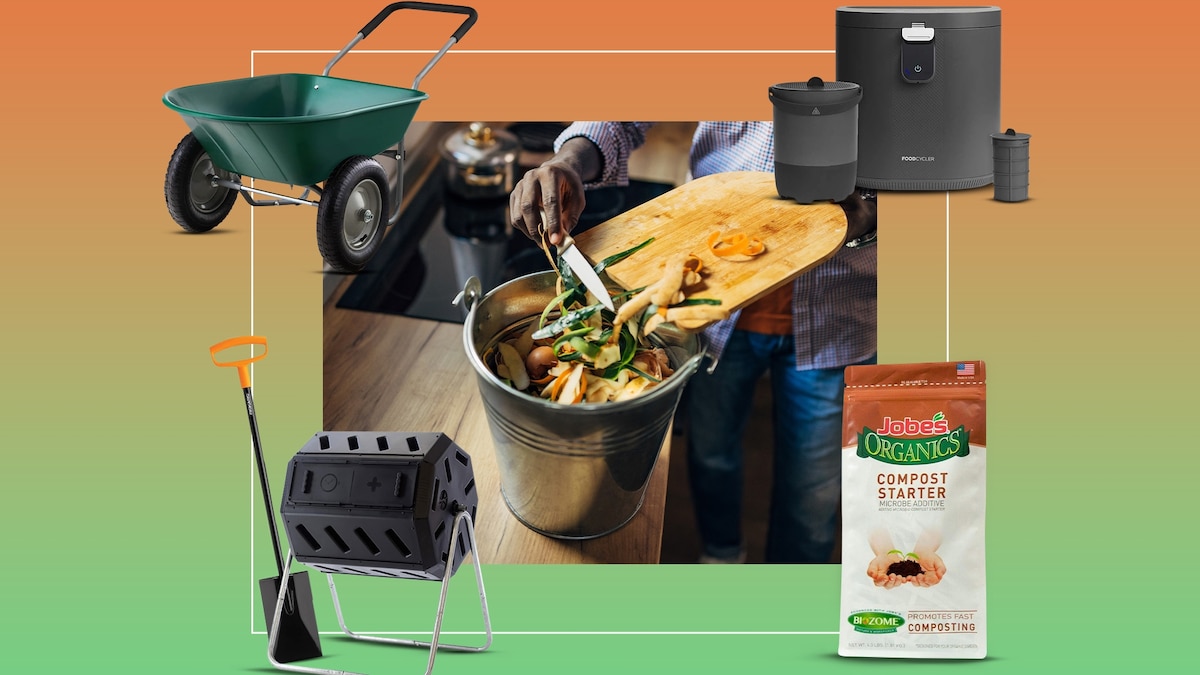
Like any horticulture hobby, composting has its own set of specific tools—some you need, and some that are just nice to have:
-
A composter: Depending on your composting method, you’ll need a bin, tumbler, or electric composter.
-
Gardening gloves: You probably don’t want to turn your old kitchen scraps with your bare hands. Grabbing a set of gardening gloves (like this thorn-proof pair from GLOSAV) will prevent your hands from getting too dirty.
PHOTOGRAPH COURTESY AMAZON
Buy it now on Amazon
-
Compost starter: If you’re composting with a tumbler, you’ll want to grab some compost starter to give your pile the dose of microorganisms it needs. It’s not required for bin composting (as those microorganisms are already there), but it can help speed up the decomposition process. Jobe’s Organics Fast Acting Granular Fertilizer Compost Starter is an affordable option.
PHOTOGRAPH COURTESY AMAZON
Buy it now on Amazon
-
A bucket: If you’re transporting yard waste and debris, you’ll want a bucket like this one from United Solutions for easy transport.
PHOTOGRAPH COURTESY AMAZON
Buy it now on Amazon
PHOTOGRAPH COURTESY AMAZON
Buy it now on Amazon
-
A wheelbarrow: Whether you’re composting a lot of branches and twigs from your backyard or transferring finished compost to your garden, this wheelbarrow from Best Choice Products will come in handy.
PHOTOGRAPH COURTESY AMAZON
Buy it now on Amazon
-
Compost thermometer: Checking the temperature of your compost is a crucial part of maintenance. This Reotemp thermometer makes it easy to gauge if your pile is generating enough (or too much) heat.
PHOTOGRAPH COURTESY AMAZON
Buy it now on Amazon
Step 3: Determine how you’ll collect materials
Composting is a habit, and like any habit, it’s crucial to establish a consistent routine. Whether you toss your food scraps into your outside bin every day or transfer them from a kitchen container to an outside bin weekly, Warner suggests picking the method you’re most likely to keep up with.
“It helps to identify when the compost pile will be added to and how often you will manage it,” she says. “As the saying goes, ‘out of sight, out of mind.’ ” So choose a way to collect material that will keep it top-of-mind.
Step 4: Start saving materials
Once you have your collection system, it’s time to start filling it. Warner says you need a mix of two different kinds of materials.
-
Brown materials: carbon-rich organic matter like branches, twigs, cardboard, and wood chips that circulate air and absorb moisture.
-
Green materials: nitrogen-rich organic matter like food scraps, coffee grounds, and untreated grass clippings that provide moisture and nutrients.
Step 5: Create your first layer
Once you’ve saved enough nitrogen- and carbon-rich materials to make a 5- to 6-inch base layer, it’s time to start building. Water your compost base until everything is fully saturated.
Warner says to “layer your compost pile like lasagna” and alternate between brown and green materials. This mix of materials not only helps you keep track of what you are adding but also ensures that you’re creating the right balance of brown to limit any future problems.
Step 6: Maintain and monitor your heap
Composting is an ongoing process, and it’s essential to keep a close eye on how your heap is doing and make adjustments as needed. According to Warner, regular maintenance includes:
-
Checking the temperature and making sure it stays between 140 and 160 degrees Fahrenheit. If it’s too hot, add more brown materials and turn the pile. If it’s too cool, add in green materials and turn the pile.
-
Watering it if it feels too dry.
-
Adding more brown materials to circulate the air if it’s too wet and starts giving off a bad odor.
How to compost at home with a tumbler
Unlike composting in a traditional yard bin, Warner says that tumbler composting dehydrates food scraps by using a sealed man-made container system that you spin to rotate the materials. While tumblers are faster than bins and better at reducing odor and pests, Warner warns that there is very little microbial activity to help assist the decomposition process—which can result in low-quality compost.
“The only microbial activity present in tumblers is in the scraps you put in,” she says. The less microbial diversity in your finished compost, the fewer nutrients it provides to your plants and landscape.”
Step 1: Get the right composting equipment
The most important item you need if you’re taking this composting route is a tumbler. You should choose the model based on your available space, but we like this one from FCMP Outdoor Store. It comes in two size options—22 and 37 gallon—and has built-in interior fins to help break up big clumps of compost.
PHOTOGRAPH COURTESY AMAZON
Buy it now on Amazon
Step 2: Create a base of compost starter or finished compost
Warner says that since most tumblers don’t create enough microbial activity on their own, you’ll need to start the decomposing process yourself. You can use finished compost or composting starter, a pre-made mix of fungi and bacteria, to create a base layer. Compost starters and the tumblers will state how much of a base to add.
Step 3: Add your materials
Like a compost bin, a mix of brown-rich materials (like sawdust and untreated wood chips) and green-rich materials (like food scraps and untreated grass clippings) is vital to making good tumbler compost. Once you have that mixture loaded in, Warner says to make sure all materials are watered thoroughly. Then, turn the tumbler to create airflow and activate the microbial activity.
Step 4: Maintain and monitor your heap
Warner recommends the following maintenance checks for tumblers:
-
Adding new materials every one to two days, alternating between green and brown materials.
-
Turning the compost tumbler every time new materials are added.
-
Checking moisture levels and adding water if necessary.
-
Keeping the compost at the temperature recommended by its manufacturer.
How to start a compost bin
Compost bins are outdoor standalone containers with an open top, much like rain barrels. Warner believes this method is cleaner and great for adding larger materials like branches. However, she recommends buying or building a lid out of untreated plywood to prevent animals from getting inside.
Step 1: Get the right composting equipment
If you’re going this route, you’ll need a durable outdoor bin that can withstand weather and potential pests. This one from F2C is affordable, can hold up to 80 gallons of material, and maintains the necessary heat and moisture for decomposition. It also has a composting bin must-have if you live around wildlife: a lid to prevent pests.
PHOTOGRAPH COURTESY AMAZON
Buy it now on Amazon
Since most people who use a compost bin are composting larger materials, it might help to grab a sifter like this one from Achla Designs. When collecting finished compost, you can use it to strain out larger materials that haven’t decomposed yet and add them back into the main pile. A smaller, counter-sized compost bin (like this one from EPICA) is also great to keep in the kitchen to collect food scraps before taking them outside.
PHOTOGRAPH COURTESY AMAZON
Buy it now on Amazon
PHOTOGRAPH COURTESY AMAZON
Buy it now on Amazon
Step 2: Select the best site
Where you set up your compost bin is crucial. The bin should be located close enough to your garden that it’s not a pain to transfer the completed compost but close enough to your home so you’re not walking too far when it’s time to add new materials.
Warner also says to place it away from any fencing or home to avoid pests and potential damage.
Step 3: Collect your materials
Warner recommends creating a 2- to 3-inch base out of brown-rich materials to improve air circulation. Yard waste like branches, twigs, and untreated wood chips are great options. Then, add a layer of green-rich materials on top to balance the carbon-to-nitrogen ratio.
Step 4: Maintain and monitor your heap
Like all other composting methods, regular maintenance is necessary for a healthy compost bin. In addition to checking the temperature and moisture levels, Warner says that you should also turn the pile every week to promote air circulation and decomposition. Keep an eye out for any pests or unwanted critters that may be attracted to the pile.
How to compost in an apartment
No yard? No problem. Warner says there are plenty of small composting options that would take up minimal space on a balcony, patio, or kitchen countertop.
Step 1: Get the right composting equipment
If you do have the luxury of some outdoor space, Warner says to grab a small tumbler rather than a small composting bin. Because tumblers sit up on legs, you won’t risk staining any concrete like you might with a bin, and it won’t give off as much of an odor.
But if composting outside is not an option, she suggests opting for an electric composter or food scrap processor. While these small machines (like the FoodCycler by Vitamix) won’t result in finished compost like a tumbler will, they will break down food scraps into a nutrient-rich soil amendment that you can add to any soil to increase its fertility over time. And they won’t stink up your place.
PHOTOGRAPH COURTESY AMAZON
Buy it now on Amazon
Step 2: Dehydrate your food
If you’re using a tumbler, you can follow the same steps listed above. But if you’ve gone the electric composter route, Warner warns that no two devices are the same. She says to follow the manufacturer’s instructions on what to put in and what to leave out.
Step 2: Mix your scraps into your soil
Again, an electric composter won’t give you finished compost. But that doesn’t mean you can’t reap the benefits of your food scraps. Once they are broken down, Warner says to mix them 1 to 1 1/2 inches below the soil surface. Over time, the food will break down on its own and add nutrients to your soil.
What to compost
Warner says you can compost a mix of brown, carbon-rich materials and green, nitrogen-rich materials. Just make sure that any yard or plant debris you use is untreated, as lingering pesticides or chemicals can contaminate plants, humans, and animals.
-
Newspaper or junk mail without shiny coating
-
Cardboard without stickers or tape
-
Pizza boxes
-
Paper bags
-
Yard waste like branches, twigs, wood chips, or leaves
-
Grass clippings
-
Plant debris
-
Vegetable scraps
-
Fruit scraps (though citrus peels should be used in moderation)
-
Coffee grounds
-
Paper filters
-
Paper towels
-
Eggshells
-
Paper tea bags without staples
-
Twine
-
Dryer lint
-
Pet and human hair
-
Toilet paper and paper towel rolls
-
100% bamboo, cotton, or wool clothing
-
BPI-certified compostable plastics
What not to compost
Composting might seem like a free-for-all way of getting rid of waste, but Warner says there are a few things that don’t belong in your compost bin. Some items contain toxic parasites and bacteria that can be harmful to your soil and others attract unwanted pets to your bin.
-
Cat litter
-
Pet droppings
-
Human feces
-
Fish
-
Poultry
-
Beef
-
Pork
-
Dairy
-
Bones
-
Baked goods
-
Fatty foods
-
Grease
Benefits of composting
Turning your trash into nutrient-rich treasure for your plants has a number of benefits.
-
Reduce waste: By saving your compostable materials from ending up in landfills, you can reduce the amount of waste produced by your household. A 2022 study estimated that if the U.S. increased its compost-to-waste ratio by 18 percent it would reduce carbon emissions by 30 million tons per year and save $16 billion in municipal waste management costs.
-
Improve plant growth: According to Warner, compost improves soil structure, fertility, and water retention—all factors that considerably affect plant growth. More research is needed to back these claims, but a 2023 study did find that food waste compost specifically increased the height, leaf area, and fresh yield of Swiss chard plants.
-
Save money: Warner says that composting eliminates the need for store-bought fertilizers, which can be expensive and contain synthetic chemicals that can harm plants, water sources, and animals.
What is compost used for?
The most obvious use for compost is to turn your everyday waste into nutrient-rich soil for your garden. But you can also mix it with potting soil to improve the health of your houseplants, spread it on top of your yard soil to add nutrients and improve drainage, or use it like a mulch for weed suppression.
Warner adds that having nutrient-rich soil and fertilizer at your fingertips means you can also share it with friends and family who are also looking to create a sustainable garden.
Your composting questions answered
What’s the laziest way to compost?
According to Warner, simply adding to a compost bin without regularly watering or turning the heap is the laziest way to compost. “This may cause unpleasant odors, but eventually everything will break down,” she says.
What is compost starter?
Compost starter is a product that contains beneficial fungi and bacteria to help speed up the decomposition process. Warner says it’s not necessary to use a compost starter, but it can be especially helpful when using a tumbler or a bin since those necessary microorganisms are not as readily available.
How long does it take to make compost?
Composting doesn’t happen overnight. Warner says to prepare to wait six months to a full year for finished compost if you’re using a bin system. A tumbler is a lot faster, taking around two to three weeks.
How much space do I need to compost?
The space you need will depend entirely on the composting system you use. But generally, Warner says a 3-foot-by-3-foot-by 3-foot system is the most effective for helping microbial life decompose organic matter.
Emily Blackwood is a freelance service journalist based in San Diego, CA. Her work has been published in Stylist, Apartment Therapy, PEOPLE, Outside Magazine, Medicinal Media, SELF, and HuffPost. You read about her latest discoveries at emily-blackwood.com.
*Although we are sharing our personal opinions of these experiences or products with you, National Geographic is not endorsing these experiences or products on behalf of anyone. It has not performed product safety testing on any of these products, did not manufacture them, and is not selling, or distributing them and is not making any representations about the safety or caliber of these products or experiences for individual consumers. Prices and availability are subject to change from the date of publication.